How to: Converter iPod Video for Windows PC? Part 3 - Mp4 Converter
In Part 1 of this tutorial, you learned how to "rip" a DVD into one or more .VOB files that are great except for one thing: the iPod cannot read them. Part 2 below focuses on "Converters," programs that transform .VOB format video files into a format that the iPod can play, and Part 3 helps you transfer the finished iPod-ready files to your video-ready iPod.
Part 2: Converting Your Ripped Movie to an iPod-Formatted File
There are many programs that handle the task of converting foreign video files into an iPod-friendly format. As explained in a separate iLounge tutorial, Apple's own iTunes can convert some videos automatically - just drag the video files into iTunes, right-click on them and select Convert Selection for iPod, but it won't handle .VOB files. So you'll need to use a different program, such as one of these:
1,Videora iPod Converter
2, 3GP Converter
3,Handbrake(Free,still in beta stage for PCs)
4,Apple's QuickTime Pro ($30) + MPEG2 Playback Component ($20), both purchased together at the Apple online store.
We'll look at Videora iPod Converter below, and you can jump right into the tutorial if you want, but there are a few technical terms we think you should read about first.
Aspect Ratio: The width of a video image relative to its height. Old TV sets almost always have a 4:3 aspect ratio. Most HDTV sets use a "widescreen" aspect ratio of 16:9, resembling wider movie theater screens.
Letterboxing: A way to present widescreen video on an old 4:3 television. The new video appears in the center of the old screen, with black bars or blank space above and below the image.
CBR (Constant Bit Rate): Video or audio data that uses generally the same sized blocks to describe every unit of time - say, 128K per second - to store whatever happens in that unit of time, simple or complex. This is analogous to a writer who describes every day in a month with one sentence. As a result, the data is more likely to lose certain noticeable details during complex moments, while too much detail will be unnecessarily stored during simple ones.
VBR (Variable Bit Rate): Video or audio data that allows for different-sized blocks in the same file, resulting in an average bit rate that provides more and less detail where necessary. This is analogous to a writer who picks the most important days in a month to write more about, devoting little or no time to unimportant ones.
Pixelization/Pixelation: These terms both refer to the transfer of analog format photographs - such as the individual frames of a movie shot with a traditional camera - into digital pictures that are represented by a limited number of colored dots, called pixels. A pixelized or pixelated image is one in which individual pixels are obvious to the viewer, a process which becomes more likely as a small image with few pixels is blown up larger and larger, making the separate dots increasingly easy to see. For this reason, videos that look good on small (iPod) screens may not look good on large (TV) screens, so you want to have enough dots that pixelization does not occur. DVDs store up to 720 dots in width, the iPod's screen displays only 320.
Artifacting: Distortion added to audio or video during the compression process; in video, this is most commonly perceived as chunky blocks of too-dark or too-light pixels that appear at the edges of two contrasting colored shapes on the screen. Compress video too much and artifacing is a very likely result.
Step-by-Step Guide to Converting Videos with Videora iPod Converter
Step 1. Download and install Videora, then load the program.
Step 2. Once it's open, click on Setup in the left hand window.
Step 3. Click on the Profile tab so you can configure the profile for the movie/video that you will be converting. This step is a bit of a challenge, so just walk through the tutorial slowly.
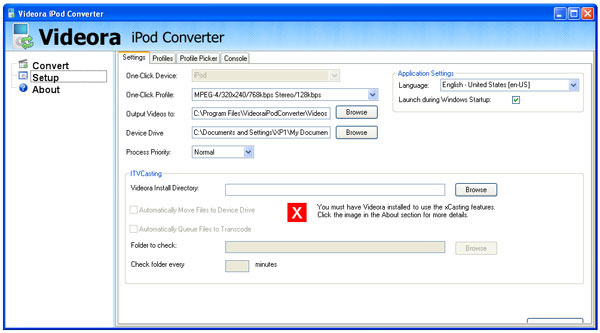
a. Under the Settings tab, take note of the words "Output Videos to." This is where your finished videos will be when Videora is done transcoding them.
b. Next, look under the Profile Picker tab. This is a calculator that helps you set up the most appropriate "Profile" for the movie/video you are about to transcode. At the top, you'll see a One-Click Profile drop down window. Select one of the profiles you want to use, but do not click Save yet. Under the Output Filesize Estimates, enter your video's time in hours, minutes and seconds in each box. Finally, under Custom Bitrate, click the Calculate button. The total file size of your finished video in Megabytes will be displayed at the bottom of the window. Each time you change the One-Click Profile after that the values will automatically change.
This information can be used to select the best profile for the video you're going to convert. Once you have decided on the best profile, click on the "Save" button at the top for that movie. You can do this separately for each video.
c.Under the Profiles tab in the Video settings section, set Full Screen (4:3) or Widescreen (16:9 or otherwise) for each video, depending on the type of video you converted or started with.
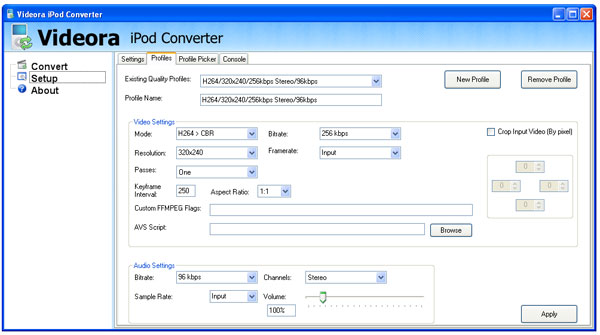
d. Under Existing Quality Profiles, select one of the choices given and you will see the values in the Video and Audio sections below it change to meet the specifications for that selection.
Example: If you select "H.264/320x240/16:9/640kbps Stereo/128kbps" you will see that the Video window values give you the choice to select the Aspect Ratio of 16:9 (Widescreen) or 1:1 (Standard). If you don't know which to choose, this information is usually found on the back of a DVD case, and you can select one or the other based on that information.
Click on the New Profiles button to add a new profile to the drop down selections. This allows you to customize your settings. Start by typing "iPod" as a description of the settings in the Profile Name box, then go down to the Apply button at the bottom and click on it to set the new settings as a profile. Next time you click on the Existing Quality Profiles menu, you will see the new settings have been added under the name "iPod." What follows are the settings we'd recommend for the iPod.
Mode: MPEG-4 > CBR
Resolution: 320x240
Passes: 1 (For higher quality, select 2 passes. This option takes twice as long, but yields a cleaner video file.)
Bitrate: 700 kbps
Framerate: 29.97 fps (Frames Per Second)
[Note: When using MPEG-4 A-VBR the boxes Min and Max will be available. When using CBR they will not be available. We'd recommend these settings if you want to try something more advanced that will look better.
Min: 128
Max: 2500
Crop Input Video (by pixel): Leave this unchecked.
e. In the 'Audio' settings section, make the following selections.
Bitrate: 128 kbps
Sample rate: Input
Channels: stereo
Volume is set to 100%
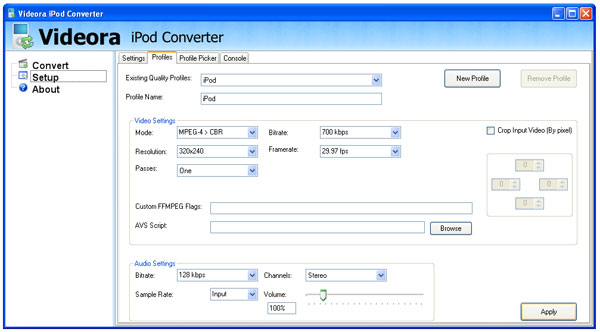
f. Click the Apply button to save the profile settings. Now that you've told the program what to do, you're ready to convert your movie.
Step 4. Return to the main window by clicking on the word Convert in the left hand window. This will take you to the main window.
Step 5. Once at the main window, click on the Transcode New Video button. When the window opens, you'll need to find the .VOB movie file you want converted. If you used Part 1 of this tutorial and placed a DVD Files or similar folder on your desktop, this is where the .VOB is located.
Step 6. Under quality profile, choose "iPod," the profile you created using the steps above. Note: you have to select this profile EVERY time you transcode, as it's not the default setting. Then click Start to begin the converting process.
Important Note: You will notice that the converting process will eventually say 100%, even though the program is still processing the file. Leave it until it finishes completely. The application will completely stop when done. If you have other movie files in the queue, Videora will load the next movie and begin to convert it. Once you've finished, move on to Part 3 of this tutorial.
Part 3: Transferring Movies To iTunes and Your iPod
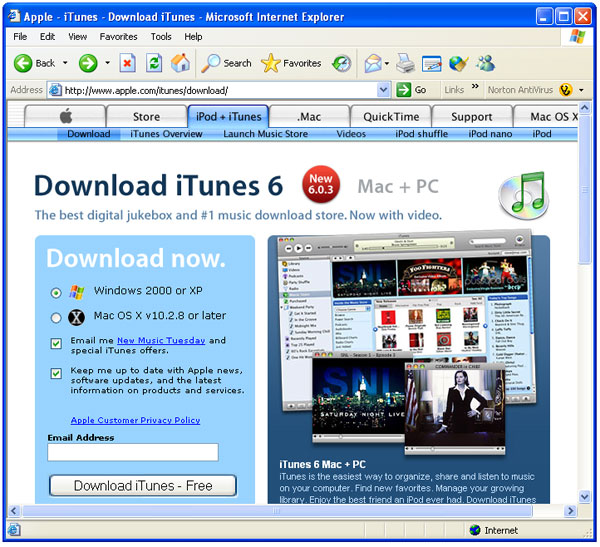
If you don't have it already, you can download iTunes here. Once it's installed, open iTunes and go to the top-of-window menu. Select File > Add Folder/File to Library, and choose the finished file created by Videora. Alternately, drag the file into the main library from your desktop. In both cases, you'll have to wait a minute or five for the video to finish transferring. You can then connect your iPod and synchronize it automatically or manually to update the music and videos found in your iTunes library.
If the video isn't capable of being transferred to the iPod, a message will appear telling you that it is not in iPod format and can't be transferred. In this case, you will need to redo the movie or video by converting the .VOB file again using different settings. Alternately, if iTunes can play the movie, but just can't send the file to the iPod, try highlighting the converted video in iTunes, and either right-click to choose Convert Selection to iPod, or go to the Advanced menu at the top of the window, then select Convert to iPod. Wait until it's done, and the resulting video will transfer to and play on the iPod.
Now you're finished, with a movie that you can watch on the iPod's screen, or even connect with a video cable to your television to watch in a larger format. We recommend that you try this process with one video first to see how the results look on both your iPod and a TV screen. If you notice any pixelization or artifacting, you may want to try the advanced settings listed above, increasing the number of pixels and bit rate (and therefore the file size) to create higher-quality videos.

Featured Guides
Guides Categories
Video/Audio Guides
- 4Media Audio Converter Pro Tutorial
- 4Media Movie Editor 6 Tutorial
- Video Converter Ultimate Tutorial
- How to convert DAT to other videos
DVD/CD/Blu-Ray Guides
- 4Media Blu Ray Converter for Mac Tutorial
- How to convert Blu-ray disc to video files
- How to burn AVI, MPEG, VOB, DAT, M2V, MPG to DVD on Mac
- How to burn DivX to DVD on Mac
iPod Guides
- 4Media iPod Max Guide
- How to convert AVI, MPEG to iPod MP4 format
- Guide: 4Media iPod to PC Transfer
- How to convert DVD to iPod on Mac
iPhone Guides
- 4Media iPhone Contacts Transfer for Mac Tutorial
- 4Media iPhone Contacts Transfer Tutorial
- 4Media iPhone Ringtone Maker for Mac Tutorial
- 4Media iPhone Max Guide
iPad Guides
Youtube/Online Video Guides
- 4Media Online Video Converter for Mac Guide
- 4Media Online Video Downloader for Mac Guide
- 4Media Online Video Converter Guide
- 4Media Online Video Downloader Guide
PPT/PDF Guides
Others
Articles
- How to download YouTube videos for free
- How to download/convert YouTube videos to iPod
- How to download and convert YouTube videos
- All features of apple iPhone
- Now you can get more TV offerings from Apple iTunes
- Video Streamer HAVA from Snappy Multimedia
- iPod Growth Driving Demand for Flash Memory
- MediaMan HVX-3500 Review
- Uncertain whether new iPod will be delayed or not because of hurdles
- T3's top five iPod alternatives
- Envivio Exhibits MPEG-4 Solutions from Mobile to HD at CCBN2006