Guide: 4Media Burner Studio
4Media Burner Studio can burn data on your hard disk to data CD/DVD, backup Data CD or unprotected DVD to another disc, and make any files on hard disk or CD/DVD disc into ISO image file. Here is a step-by-step guide to show you how to burn data to CD/DVD and make ISO image file.
How to burn files to data CD/DVD?
How to make ISO image file from any files?How to copy disc?How to edit ISO image file?
Download, install and launch 4Media Burner Studio.
How to burn files to data CD/DVD?
Step 1: Insert CD/DVD disc
Insert a blank or rewritable disc into your recordable DVD driver.
Step 2: Load files
Click "Add File(s)" button on the toolbar or click "File > Add File" to load files you want to burn. Or click "Add Folder" button on the toolbar or click "File > Add Folder" to load folder. After loading files, you can create folder to adjust the file structure in your disc by clicking "New Folder" button on the toolbar or "File > New Folder" option in the main menu.
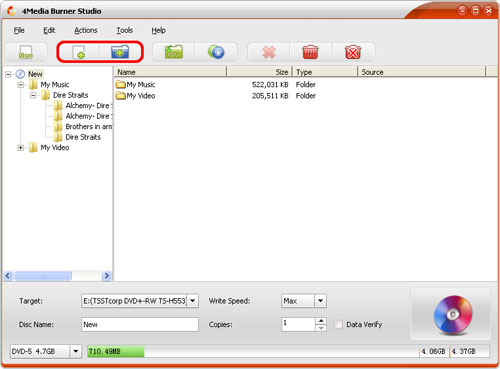
From the capacity bar at the bottom of the main interface, you can check whether the total file size exceeds the capacity of the inserted disc.
Step 3: Adjust output settings
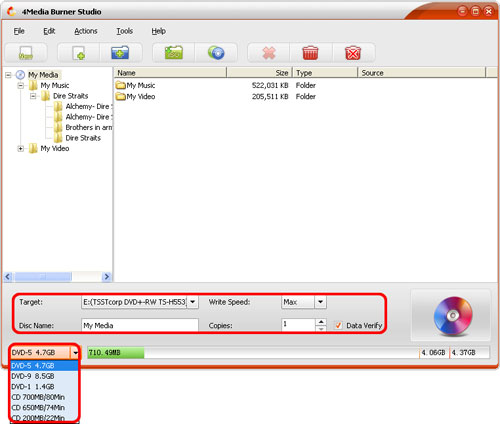
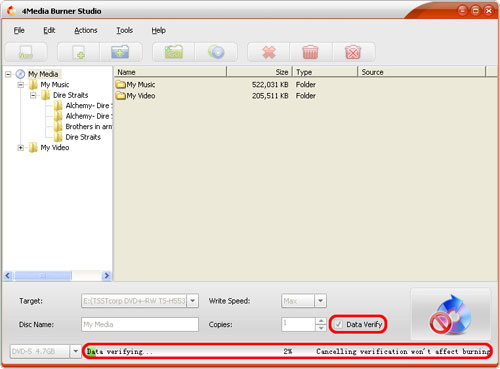
Select a recorder as the target, and specify "Write Speed", "Disc Name", and "Copies" according to your own need, and select a disc type from the left bottom drop-down list. If you check the "Data Verify" option, then the program will automatically start verifying your target disc data after burning completed.
Tip: If you insert a rewritable disc, then before you start burning, you should click "Tools > Erase Rewritable Disc" option from the main menu to go to the "Erase Rewritable Disc" window.
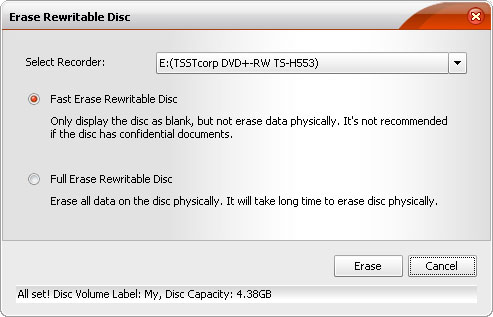
Select the recorder you want to erase, and select "Fast Erase Rewritable Disc" or "Full Erase Rewritable Disc" and click "Erase" button to start erasing.
Step 4: Start burning
After all above are set, click "Start Burn" button at the right bottom to start burning. You can click "Cancel" button to cancel the burning at any time.
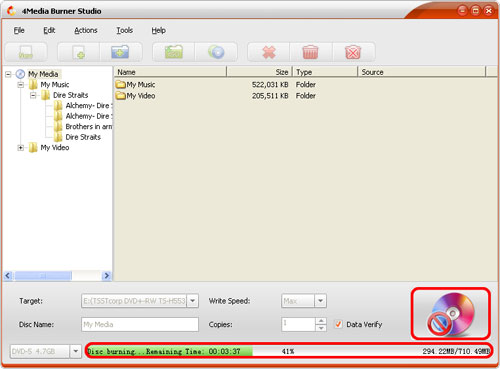
After burning completed, the program will automatically start verifying disc data. Cancelling the verification won't affect the burning, you can cancel verifying if you want.
How to make ISO image file from any files?
Step 1: Load files
Click "Add File(s)" button on the toolbar or click "File > Add File" to load files you want to burn. Or click "Add Folder" button on the toolbar or click "File > Add Folder" to load folder. After loading files, you can create folder to adjust the file structure in the image file by clicking "New Folder" button on the toolbar or "File > New Folder" option in the main menu. From the capacity bar at the bottom of the main interface, you can check the total file size.
Step 2: Adjust output settings
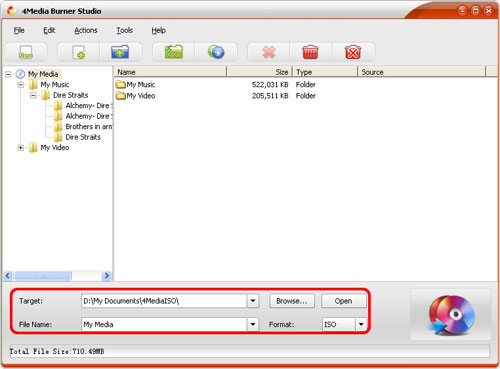
Select "Save as Image File" option from the "Target" combo box, then click "Browse" button to specify the target folder to save the image file. You can enter a file name in the "File Name" box.
Step 3: Start making ISO image
After all above are set, click "Make Image File" button at the right bottom to start making image file.
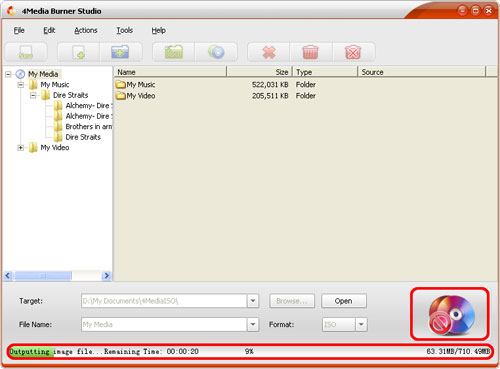
After making completed, you can click "Open" button beside the "Browse" button to check the output ISO image file.
The software supports copying data DVD from one disc to another disc or copying disc to ISO image file.
Step 1: Insert source disc
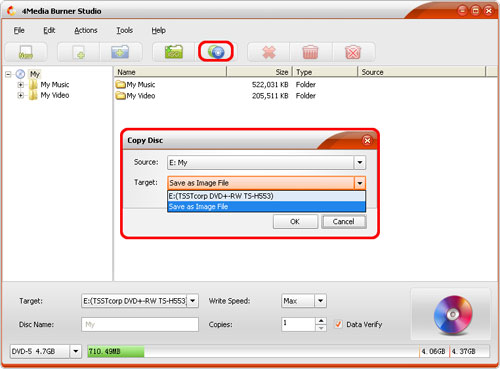
Click "Copy Disc" button on the toolbar or click "File > Copy Disc" option, then the "Copy Disc" dialogue box pops up.
Step 2: Choose source and target
Choose the source you want to copy from the "Source" list, and choose the target from "Target" list.
Step 3: Start copying
Click "OK" in the "Copy Disc" dialogue box, then the program starts copying disc.
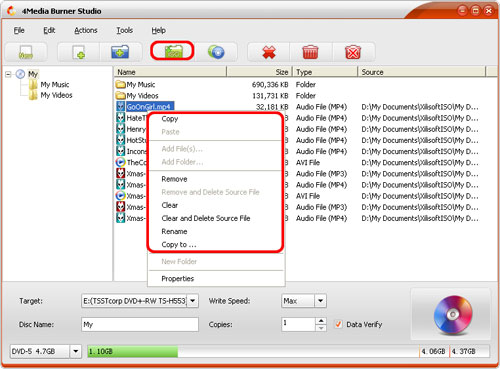
Step 1: Open and edit image file
Click "Open Image File" button on the toolbar or "File > Open Image File" option to load the ISO image file you want to edit. You can add any file in the hard disk to the ISO image file, or delete any file from it, or extract any file in the ISO image file to the local, or do other operations from the right-click menu as below.
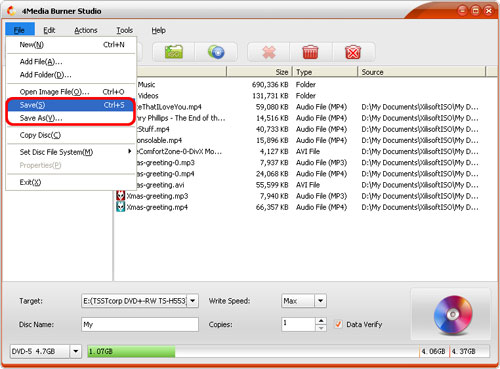
Step 3: Save ISO image file
After editing ISO image file, click "File > Save" option to save the modified ISO image file, or click "File > Save As" option to save the modified image file as a new one.

Featured Guides
Guides Categories
Video/Audio Guides
- 4Media Audio Converter Pro Tutorial
- 4Media Movie Editor 6 Tutorial
- Video Converter Ultimate Tutorial
- How to convert DAT to other videos
DVD/CD/Blu-Ray Guides
- 4Media Blu Ray Converter for Mac Tutorial
- How to convert Blu-ray disc to video files
- How to burn AVI, MPEG, VOB, DAT, M2V, MPG to DVD on Mac
- How to burn DivX to DVD on Mac
iPod Guides
- 4Media iPod Max Guide
- How to convert AVI, MPEG to iPod MP4 format
- Guide: 4Media iPod to PC Transfer
- How to convert DVD to iPod on Mac
iPhone Guides
- 4Media iPhone Contacts Transfer for Mac Tutorial
- 4Media iPhone Contacts Transfer Tutorial
- 4Media iPhone Ringtone Maker for Mac Tutorial
- 4Media iPhone Max Guide
iPad Guides
Youtube/Online Video Guides
- 4Media Online Video Converter for Mac Guide
- 4Media Online Video Downloader for Mac Guide
- 4Media Online Video Converter Guide
- 4Media Online Video Downloader Guide
PPT/PDF Guides
Others
Articles
- How to download YouTube videos for free
- How to download/convert YouTube videos to iPod
- How to download and convert YouTube videos
- All features of apple iPhone
- Now you can get more TV offerings from Apple iTunes
- Video Streamer HAVA from Snappy Multimedia
- iPod Growth Driving Demand for Flash Memory
- MediaMan HVX-3500 Review
- Uncertain whether new iPod will be delayed or not because of hurdles
- T3's top five iPod alternatives
- Envivio Exhibits MPEG-4 Solutions from Mobile to HD at CCBN2006