How to transfer photos from iPhone 5s to Mac

My friend has a new iPhone 5s and gets a lot of interesting photos on it. I like the photos and want to save them to my Mac. However, I can not sync his iPhone 5s with my iTunes. So I need another third party software to help me transfer the photos to my local disk. 4Media iPhone Max Platinum for Mac is a good choice.
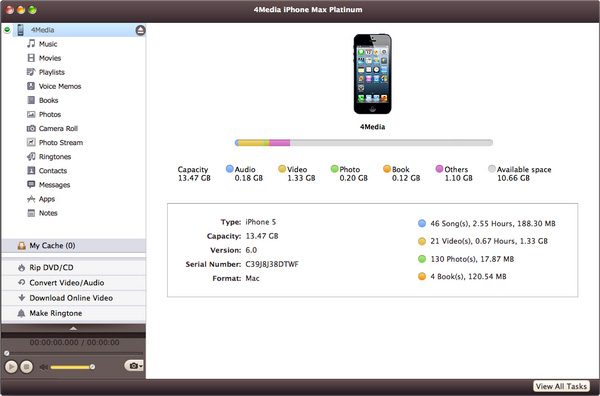
With this iPhone management tool, you can easily transfer iPhone files between device, Mac and iTunes. Firstly, download and install the Free Download iPhone Max Platinum for Mac
Launch the iPhone 5s management tool and here we go.
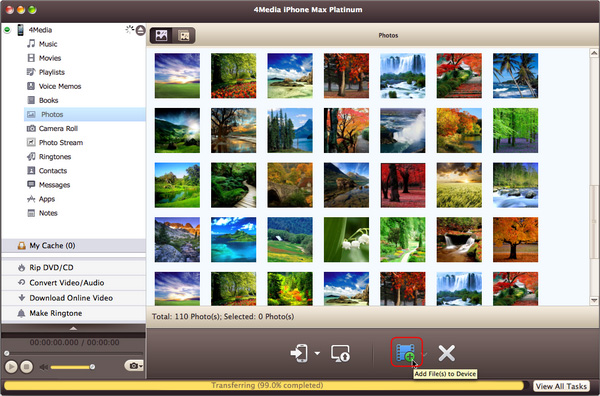
Step 1: Choose photos
In the left directory tree, choose Photos or Camera roll. All the photos in the selected list will be shown in the right list immediately.
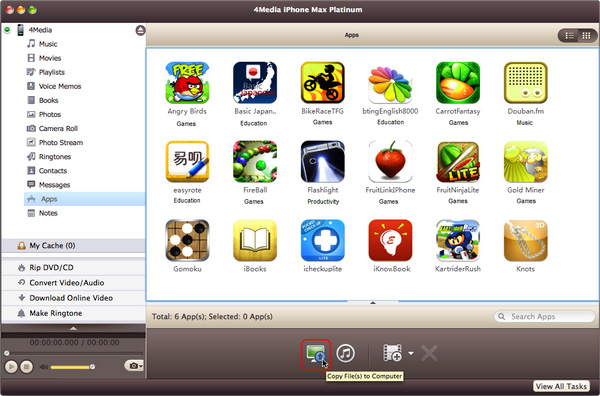
Step 2: Export photo to Mac
Check the wanted photos in the right file list, click "Copy File(s) to Computer" button at the bottom of the file list, and locate the target folder in the dialog box that appears, then start exporting.
Step 3: Copy photos to my iPhone
Plug-in my iPhone and in the left directory tree, select Photo or Camera list that you want to import photos into. And then click "Add File(s) to Device" drop-down button, choose "Add File(s) to List..." option, select the photos you want to add in the dialog box that appears, and load them to your device.
With this 4Media iPhone Max Platinum for Mac, you also can copy movies, music, books and photos from local folder to iPhone/iPod without overwriting original iPhone/iPod files. Let's have a try.