Guide: 4Media Apple TV Video Converter for Mac
This step-by-step tutorial will show you how to convert various video files to Apple TV video and audio files for enjoying any video file via Apple TV. Download and install 4Media Apple TV Video Converter for Mac on your Mac, then follow the steps below to accomplish the Apple TV video conversion.
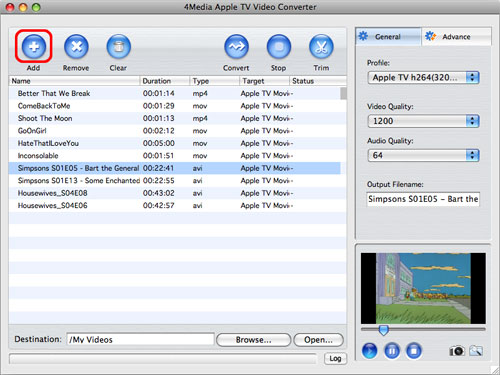
Step 1: Load files
Run 4Media Apple TV Video Converter for Mac, click "Add" button on the toolbar or "File > Add" to load the files you want to convert. The loaded files are displayed in the file list.
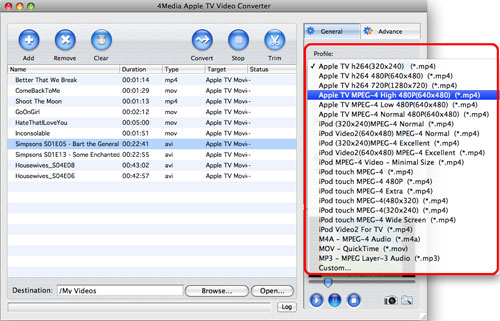
Step 2: Set the output format, destination and file name
If you want to change the default target format, then choose the files to convert, and select the profile you want from the "Profile" drop-down list on the "General" tab.
Click the "Browse" button to choose the folder to save the output files or just keep the default path, and enter the output file name you want in the "Output filename" textbox on the "General" tab.
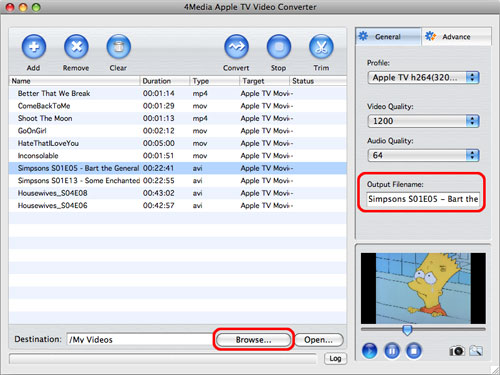
Tip: Before converting, you can preview the source file via the built-in player in the right bottom and also take a snapshot when previewing by clicking the "Capture Frame" button.
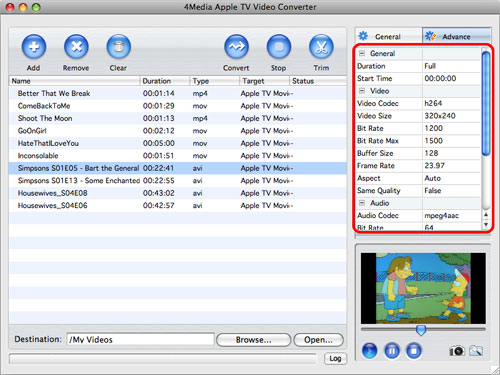
Step 3: Set output parameters
If you're not satisfied with the default settings of the profile, you can adjust the parameter settings. Change video quality and audio quality on the "General" tab, or go to the "Advance" tab, and set the following parameters: video size, bit rate, frame rate, aspect, etc.
Tip: If you just want to convert certain segment of a video, you can make it by entering the duration and start time on the "Advance" tab or following the steps below to get the segment you want.
Choose the video you want to trim, and click the "Trim" button on the toolbar to enter the "Trim" window, then click the "Play" button to play the video. When it comes to the very start position, click the "Set Begin" button to set it as begin point, and then click the "Set End" button to set end point, then you will get the segment you want.
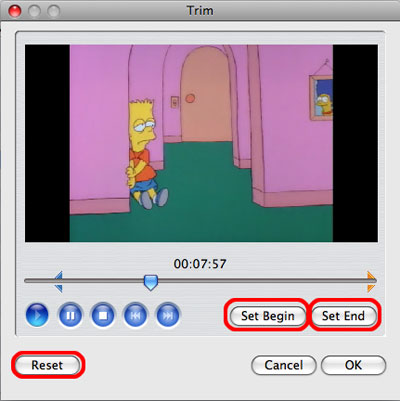
If you're not happy with the segment you set, just click the "Reset" button to reset the segment. Click the "OK" button to apply your settings, and then a scissors icon will be added to the front of the file name.
Step 4: Start conversion
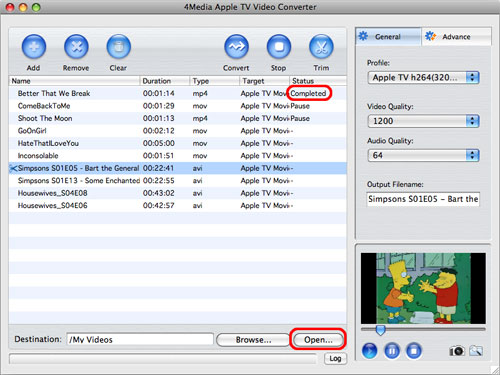
After everything is OK, click the "Convert" button on the toolbar to start converting.

After the conversion completed, click the "Open" button next to the "Browse" button to open the destination folder for viewing the output files conveniently.

Featured Guides
Guides Categories
Video/Audio Guides
- 4Media Audio Converter Pro Tutorial
- 4Media Movie Editor 6 Tutorial
- Video Converter Ultimate Tutorial
- How to convert DAT to other videos
DVD/CD/Blu-Ray Guides
- 4Media Blu Ray Converter for Mac Tutorial
- How to convert Blu-ray disc to video files
- How to burn AVI, MPEG, VOB, DAT, M2V, MPG to DVD on Mac
- How to burn DivX to DVD on Mac
iPod Guides
- 4Media iPod Max Guide
- How to convert AVI, MPEG to iPod MP4 format
- Guide: 4Media iPod to PC Transfer
- How to convert DVD to iPod on Mac
iPhone Guides
- 4Media iPhone Contacts Transfer for Mac Tutorial
- 4Media iPhone Contacts Transfer Tutorial
- 4Media iPhone Ringtone Maker for Mac Tutorial
- 4Media iPhone Max Guide
iPad Guides
Youtube/Online Video Guides
- 4Media Online Video Converter for Mac Guide
- 4Media Online Video Downloader for Mac Guide
- 4Media Online Video Converter Guide
- 4Media Online Video Downloader Guide
PPT/PDF Guides
Others
Articles
- How to download YouTube videos for free
- How to download/convert YouTube videos to iPod
- How to download and convert YouTube videos
- All features of apple iPhone
- Now you can get more TV offerings from Apple iTunes
- Video Streamer HAVA from Snappy Multimedia
- iPod Growth Driving Demand for Flash Memory
- MediaMan HVX-3500 Review
- Uncertain whether new iPod will be delayed or not because of hurdles
- T3's top five iPod alternatives
- Envivio Exhibits MPEG-4 Solutions from Mobile to HD at CCBN2006